Navigating the precise dimensions required for various print projects can often feel like a meticulous puzzle, especially when aiming for the widely recognized standard of a credit card. Whether you're designing mock-ups, creating custom gift cards, or simply need to visualize items at this specific scale, having a reliable Credit Card Size Template For Word can dramatically simplify your workflow. This guide will walk you through the essential steps and considerations for achieving perfect credit card dimensions using Microsoft Word, transforming a potentially complex task into an accessible one for anyone.
The ubiquitous credit card serves as a universal benchmark for compact, durable, and information-rich physical items. Its precise dimensions are not arbitrary but are governed by international standards to ensure compatibility across billions of card readers and wallets worldwide. For designers, marketers, and even small business owners, replicating this standard size accurately within a common software like Word is invaluable for a myriad of applications, from personalized key fobs to professional-looking access passes.
Many individuals and businesses struggle with the trial-and-error method of printing and resizing when trying to achieve specific dimensions. This can lead to wasted materials, lost time, and frustration. A well-constructed template eliminates these inefficiencies, providing a consistent and accurate foundation for your designs right from the start. It empowers you to focus on the creative aspects of your project rather than wrestling with page setup settings.

This comprehensive article will explore not just how to create or use a template, but also the underlying standards, practical applications, and expert tips to ensure your designs are always on point. By the end, you'll be equipped with the knowledge and tools to confidently produce credit card-sized documents directly from Microsoft Word, streamlining your design and printing processes.

Understanding Standard Credit Card Dimensions
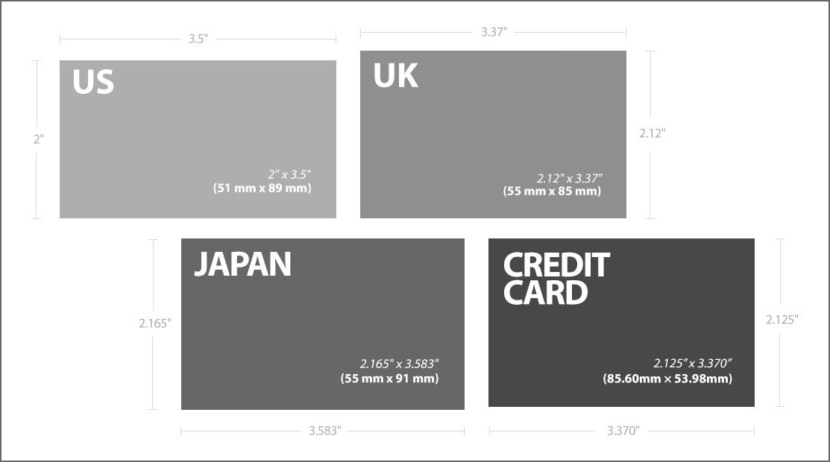
Before diving into template creation, it's crucial to understand the exact dimensions we are aiming for. The international standard for identification cards, including credit cards, is specified by ISO/IEC 7810 ID-1. This standard ensures uniformity across the globe, allowing cards to fit universally into wallets, card readers, and other devices.

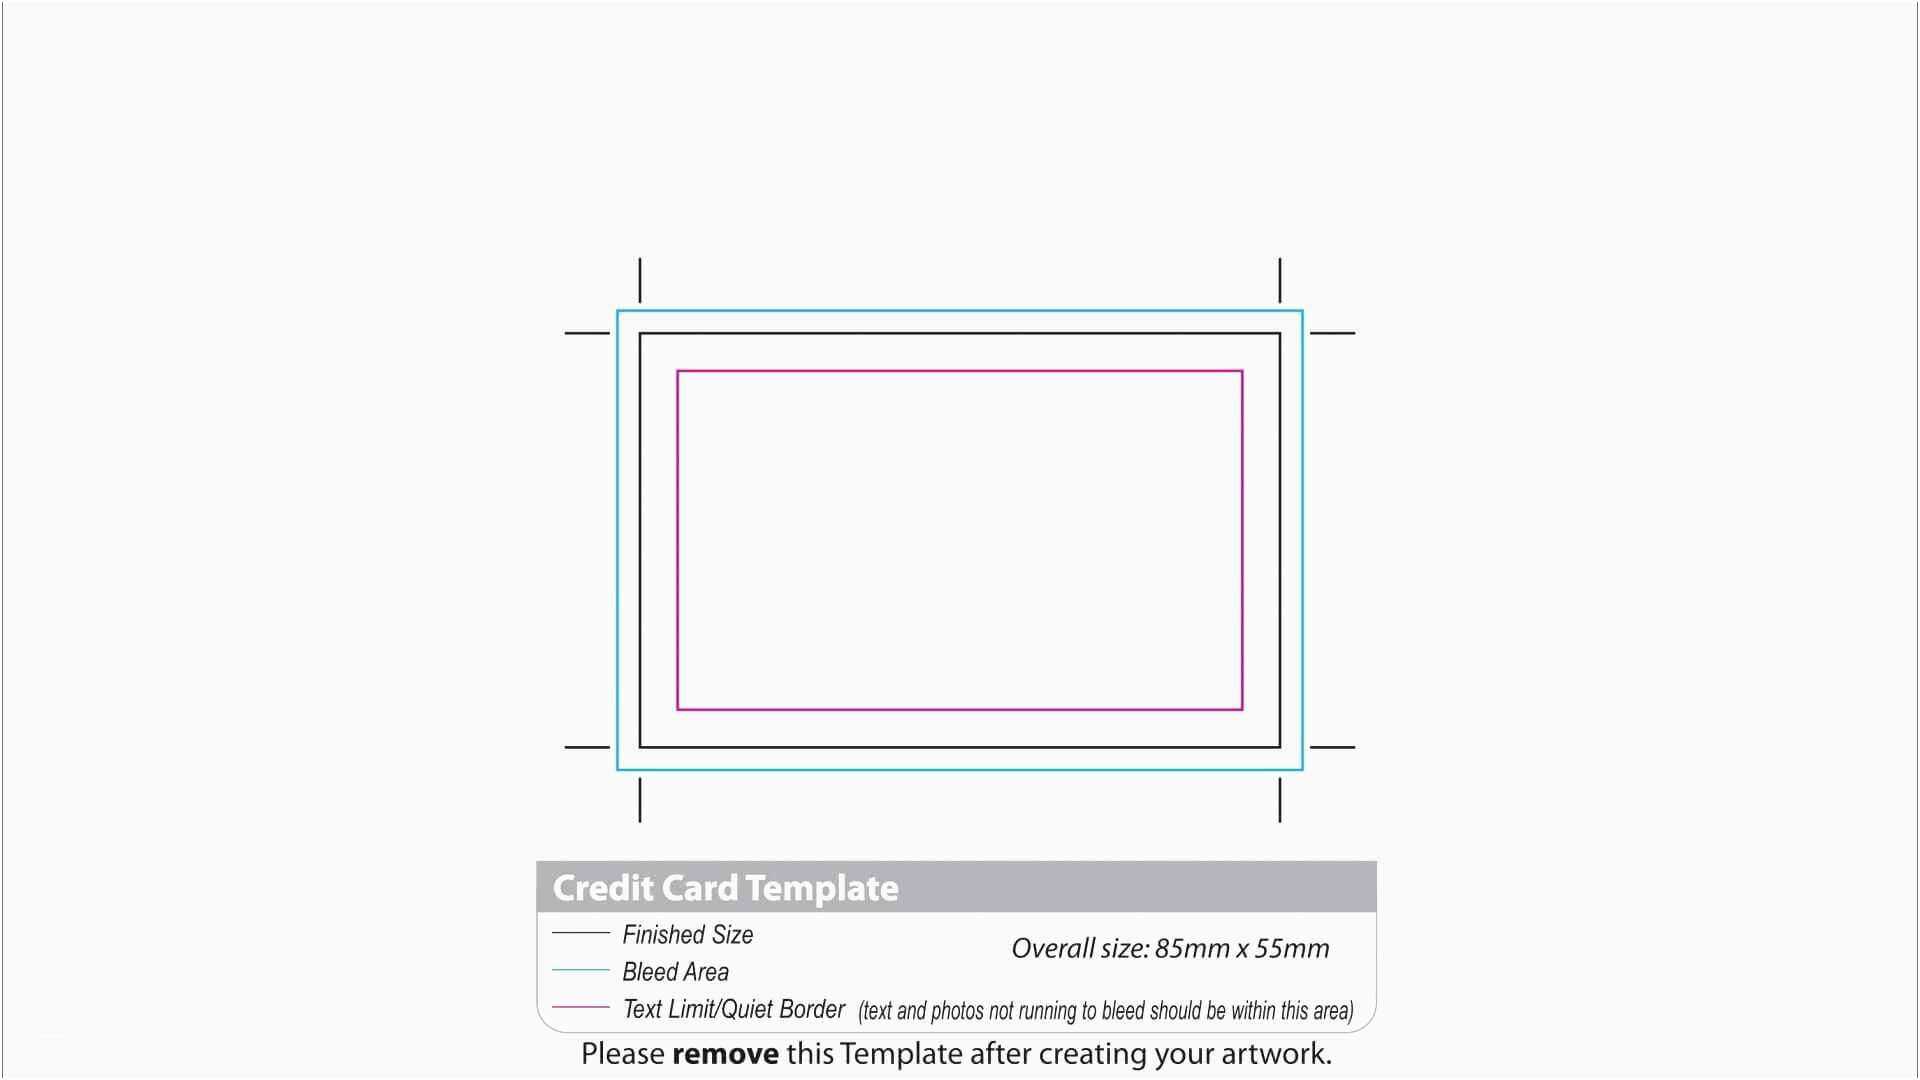
The ISO/IEC 7810 ID-1 standard defines the credit card size as:
* Width: 85.60 mm (3.370 inches)
* Height: 53.98 mm (2.125 inches)
* Thickness: 0.76 mm (0.030 inches)

While the thickness isn't directly relevant for a flat template in Word, the width and height are paramount. When designing your template, you'll be primarily concerned with these two measurements. It's important to note that these dimensions represent the cut size of the card. If you're sending your design to a professional printer, they might also require a "bleed" area – an extra margin around the edges that gets trimmed off, preventing white edges if there's slight misalignment during cutting. For a Word template focused on home or office printing, you'll typically work with the exact cut size.
Why a Credit Card Size Template For Word is Essential
The utility of a Credit Card Size Template For Word extends far beyond merely replicating a payment card. Its applications are diverse and incredibly beneficial for individuals and small businesses seeking professional-looking results without specialized design software.

Versatile Applications
- Business Cards: While traditional business cards are often larger, a credit card-sized option offers a unique, modern, and wallet-friendly alternative that can stand out.
- Loyalty and Gift Cards: Small businesses can create branded loyalty cards or gift vouchers that customers can easily carry, fostering repeat business and enhancing customer experience.
- ID Badges and Access Cards: For small offices, events, or volunteer organizations, custom ID badges can be quickly generated and printed, providing a professional appearance and aiding identification.
- Event Tickets: Compact event tickets that can be stored in a wallet or on a lanyard become much simpler to design and print.
- Miniature Reference Guides: Creating quick-reference guides for complex information, like keyboard shortcuts or emergency contacts, that fit neatly into a wallet.
- Product Mock-ups and Prototypes: Designers can use the template to create realistic mock-ups of cards, labels, or small product packaging, aiding visualization and client presentations.
Benefits of Using a Template
- Accuracy and Consistency: Templates ensure that every item you print is the exact, correct size, eliminating guesswork and the need for constant re-measurement. This is crucial for maintaining a professional brand image.
- Time-Saving: Instead of manually adjusting page settings and object sizes for each new project, a template provides a ready-to-use foundation, significantly cutting down design time.
- Ease of Use: Microsoft Word is a widely accessible and familiar program. Using it for specific dimensions makes professional design achievable for those without advanced graphic design software skills.
- Cost-Effective: By ensuring accurate prints the first time, templates reduce waste of paper and ink, leading to cost savings, especially for bulk printing.
- Professionalism: Consistently sized items project an image of professionalism and attention to detail, enhancing your brand or personal presentation.
Creating Your Own Credit Card Size Template in Word
While pre-made templates exist, knowing how to create your own provides maximum flexibility and understanding. This step-by-step guide will walk you through building a Credit Card Size Template For Word from scratch.

Step-by-Step Template Creation
- Open a New Document: Start by opening a blank document in Microsoft Word.
- Set Page Margins:
- Go to the Layout tab on the Word ribbon.
- Click on Margins, then select Custom Margins... at the bottom.
- Set all margins (Top, Bottom, Left, Right) to
0.0inches. Word might automatically adjust them to the minimum printable margin for your printer (e.g., 0.13 inches), which is acceptable. The goal here is to maximize the printable area. Click OK. If Word prompts about margins being outside the printable area, click Ignore.
- Insert a Shape for the Card Outline:
- Go to the Insert tab.
- Click on Shapes, and select the Rectangle tool.
- Click and drag anywhere on the page to draw a rectangle. Don't worry about the size yet.
- Precisely Size the Rectangle:
- With the rectangle selected, a Shape Format tab will appear on the ribbon.
- In the Size group (usually on the far right), you'll see Height and Width input fields.
- Enter the exact credit card dimensions:
- Height:
2.125"(or5.398 cmif working in metric) - Width:
3.370"(or8.560 cmif working in metric)
- Height:
- Crucial Tip: Ensure that the "Lock aspect ratio" option (often found by clicking the small arrow in the bottom right of the Size group to open the Layout dialog) is UNCHECKED. If it's checked, changing one dimension will automatically change the other, making precise sizing difficult. Uncheck it, then enter your dimensions.
- Position the Card:
- Right-click on the rectangle and select More Layout Options... or click the small arrow in the Size group of the Shape Format tab.
- Go to the Position tab.
- Set both Horizontal and Vertical position relative to the Page. You can choose
0for both to place it in the top-left corner, or center it using the "Alignment" options. For a single card template, precise positioning isn't as critical as the size.
- Style the Card Outline (Optional but Recommended):
- With the rectangle selected, in the Shape Format tab:
- Shape Fill: Choose "No Fill" so you can see your design elements underneath.
- Shape Outline: Choose a thin, visible color (e.g., black) to define the card's boundary. This line will act as your cut guide.
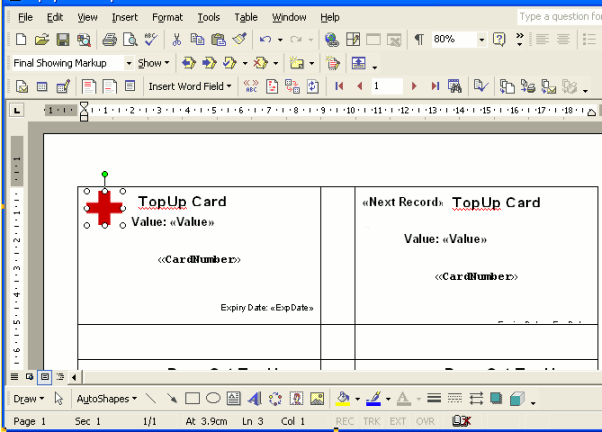
- Add Design Elements: Now you can add text boxes, images, logos, and other shapes within the boundaries of your precisely sized rectangle.
- Use Text Boxes for text, as they offer more control over positioning and formatting than simply typing directly onto the page.
- Insert Pictures for logos and graphics. Ensure you set their Wrap Text option (usually from the Picture Format tab) to "In Front of Text" or "Behind Text" for easy positioning.
- Save as a Word Template:
- Go to File > Save As.
- Choose a location (e.g., your Documents folder).
- In the "Save as type" dropdown menu, select Word Template (*.dotx). This ensures that when you open the file, it creates a new document based on your template, preserving the original template.
- Give it a clear name like "Credit Card Size Template.dotx".
Utilizing a Pre-made Credit Card Size Template For Word
Sometimes, starting from scratch isn't necessary. Many resources offer pre-made templates that can save you time. Learning how to effectively find and customize these can be just as valuable as creating your own.
Finding and Downloading Templates
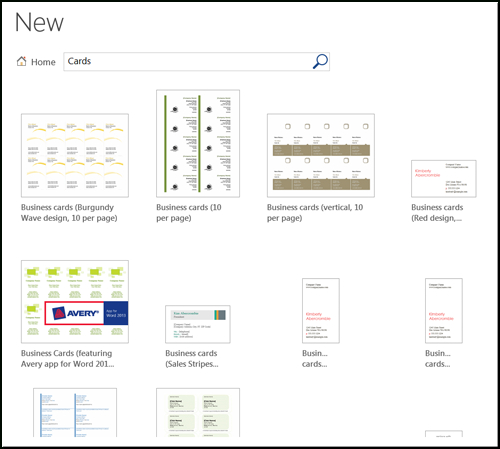
- Microsoft Office Template Gallery: Word itself has a vast online template library. While a specific "credit card size" template might not be immediately obvious, you can search for "ID cards," "gift cards," or "business cards" and then adjust the dimensions of the elements within those templates.
- Third-Party Websites: Many graphic design and template websites offer free or paid Word templates. A quick search for "Credit Card Size Template For Word download" will yield numerous results. Look for reputable sites to ensure quality and safety.
- Printable Resource Sites: Websites dedicated to printable crafts or business resources often provide templates for various card sizes.
Customizing an Existing Template
- Open the Template: Once downloaded, simply open the
.dotxfile (or a regular.docxfile if it's a standard document formatted as a template). If it's a.dotxfile, Word will automatically create a new document based on it. - Verify Dimensions: Even with a pre-made template, it's wise to verify the dimensions of the main card shape. Select the primary rectangle or bounding box, and check its height and width in the Shape Format tab, as outlined in the "Creating Your Own" section. Adjust if necessary.
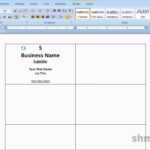
- Replace Placeholder Content: Most templates come with placeholder text, images, or logos.
- Text: Click on text boxes and type in your desired content. Adjust fonts, sizes, and colors as needed.
- Images/Logos: Right-click on placeholder images and select "Change Picture" to insert your own.
- Adjust Design Elements: Modify colors, shapes, and layouts to match your branding or personal preference. Remember to keep all critical design elements within the defined credit card boundaries.
- Save Your Customization: Save your modified document as a regular Word Document (.docx) or as a PDF if you intend to print it directly or send it to a professional printer. If you wish to save your customized version as a new template for future use, follow the "Save as Word Template" steps.
Advanced Tips for Designing Credit Card-Sized Items in Word
While Word might not be a dedicated graphic design powerhouse, you can still achieve impressive results for your credit card-sized projects with a few advanced techniques.
Managing Multiple Cards on a Single Page
To save paper and time when printing multiple credit cards, you can arrange several card outlines on a single A4 or Letter-sized page.

- Using Tables:
- Insert a table (e.g., 2 columns, 4 rows for 8 cards) into your document.
- Set precise row height and column width.
- Insert your credit card shape (set to "In Front of Text" wrapping) into each cell. This method can be tricky if your shapes aren't perfectly contained.
- Manual Duplication and Alignment:
- Create your single credit card shape.
- Copy (Ctrl+C) and Paste (Ctrl+V) the shape multiple times.
- Use Word's alignment tools (Shape Format > Align) to distribute them evenly and align them to the top, bottom, left, or right edges of the page. Grouping shapes together (select multiple, then Shape Format > Group) can make moving and aligning them easier.
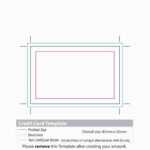
Bleed and Trim Marks for Professional Printing
If you plan to send your design to a professional printing service, they will often require a "bleed" area. This is an extra margin (typically 1/8 inch or 3mm) that extends beyond your final cut size. This prevents white edges if the cutting machine is slightly off.

- Adding Bleed in Word:
- Create your main credit card shape at the standard 3.370" x 2.125".
- Create a second, slightly larger rectangle for the bleed area (e.g., 3.620" x 2.375" if using 1/8" bleed all around).
- Place the larger rectangle behind the standard-sized one (Shape Format > Send Backward).
- Design your background elements to extend to the edges of the larger bleed rectangle. Keep all critical text and images within the smaller, standard-sized rectangle.
- Add small lines or "trim marks" at the corners of the standard-sized rectangle to indicate where the card should be cut. You'll need to remove these before printing if printing yourself. For professional printers, you usually submit a PDF with the bleed incorporated, and they handle the trim marks.
Printing Considerations
- Paper Stock: For a realistic feel, use heavier card stock (e.g., 80lb or 100lb cover stock). Test your printer's capabilities with thicker paper.
- Printer Settings: Always review your printer's settings before printing.
- Ensure "Actual Size" or "100%" scale is selected, not "Fit to Page," which can cause distortion.
- Select the correct paper type for optimal print quality.
- Print a single test page first to verify dimensions before committing to a larger print run.
- Color Profile: Word is not color-managed in the same way professional design software is. Colors might appear differently on screen than when printed. If color accuracy is critical, convert your Word document to PDF and verify colors in a PDF viewer before printing.
Troubleshooting Common Issues
Even with a well-crafted Credit Card Size Template For Word, you might encounter a few hiccups. Here's how to address common problems.
Incorrect Dimensions After Printing
- Check Printer Scaling: The most frequent culprit. Ensure your printer settings are set to "Actual size" (100%) or "None" for scaling. Avoid "Fit to page" or any percentage scaling, as this will resize your document.
- Verify Template Dimensions: Double-check the height and width of your main rectangle in Word's Shape Format tab. A slight decimal error can cause noticeable differences.
- Printer Driver Issues: Outdated printer drivers can sometimes cause printing discrepancies. Ensure your printer drivers are up to date.
Text or Images Bleeding Off the Card
- Text Box Placement: Make sure all text boxes are entirely within your credit card outline. If a text box is larger than the card boundary, its content might print outside.
- Image Sizing and Wrapping: Images should be resized to fit within the card. If an image is set to "In Line with Text," it can affect layout unpredictably. Always use "In Front of Text" or "Behind Text" for better control.
- Margin Considerations: If you applied a "bleed" area, remember that critical content should still stay within the inner, standard credit card dimensions, not the bleed area.
Difficulty Aligning Multiple Cards
- Use Guides: In Word, go to the View tab and check Gridlines. This can help you visually align objects.
- Alignment Tools: Utilize the Align options under the Shape Format tab (Align Left, Align Top, Distribute Horizontally, Distribute Vertically) to precisely arrange multiple shapes. Select all the shapes you want to align, then use these tools.
- Grouping: After aligning a set of cards (e.g., a row), group them together. This allows you to move and align the entire group as a single object without disturbing the internal alignment.
By understanding these potential pitfalls and their solutions, you can efficiently troubleshoot and ensure your credit card-sized designs come out exactly as intended.

Conclusion
Creating and utilizing a Credit Card Size Template For Word is a highly effective way to produce professional, accurately sized items for a myriad of purposes. From crafting custom gift cards to designing intricate ID badges, the ability to work with precise dimensions within a familiar program like Microsoft Word offers unparalleled convenience and control. We've covered the international standards governing credit card dimensions, explored the many practical applications of such templates, and provided detailed instructions on both creating your own and effectively using pre-made versions.
By following the step-by-step guides, understanding the importance of accurate measurements, and leveraging the advanced tips for design and printing, you can confidently transform your design concepts into perfectly scaled, tangible products. No longer will you be hindered by guesswork or trial-and-error. Embrace the power of a well-structured template to save time, reduce material waste, and consistently achieve professional-grade results right from your desktop. Empower your creative projects with precision and ease, making your next credit card-sized endeavor effortless and impactful.
![]()
0 Response to "Effortless Credit Card Size Template For Word"
Posting Komentar